Thursday, 19 December 2013

Crackle effect

This is a technique which has some interesting results. It is the application of gum arabic to a layer of BIG (Baldwin's Intaglio Ground) resist. 

1. Apply BIG in several thin layers and heat until cured (it becomes very hard like a varnish)
2. Allow to rest for 45mins to 1hour. 
3. Lightly dust with talcum powder.
4. Paint on gum arabic, preferably in a thick layer to make it stronger. Thick layers make bigger cracks but less of them, thinner layer makes more cracks which are thinner. 
5. The plate is heated on a hot plate, the gum shrinks back exposing the resist underneath. It is very unpredictable, and you can end up exposing too much resist.
6. Carefully take off the resist with cotton wool and white spirit or Lincoln Wash.
7. Carefully wash off the gum arabic with water. 
8. Etch the plate. You can do an aquatint before this process, but I didn't, not wanting to spend too much time on it.
9. Clean up the plate and it's ready to print.


A larger experiment in colour printing.

This is one of my favourite buildings, the rather sombre Hornsey Town Hall in north London. It's Art Deco and has some fascinating ironwork and staircases. I loved the back and forward quality of the stairs and how enclosed it was, so used a strong red as the diagonal and under stairs shading.
So I put it to good use as a colour print. There are 2 layers to the print- the etched zinc plate, and a thicker mylar sheet with drypoint. It's quite large for an experiment, about 45x36cm.


Colour printing

I've done some printing in colour. After buying Etching in Colour by Nigel Oxley I learned how to do a correctly registered print, using the same plate, but with different applications of ink, layered onto the same piece of paper. It has been something I've fought shy of for 3 years, being unsure of getting it right. Why did I wait?

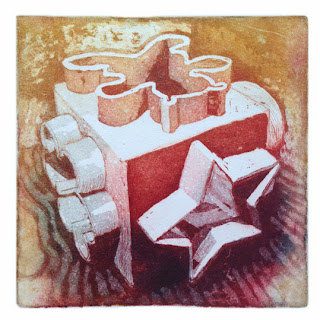
The first print was a combination of drypoint scratching on a sheet of mylar inked in yellow, then blue and magenta on the original etched plate, printed over. the mylar didn't last very long, and I hadn't quite sorted out my exact registration. The second print is a combination of the mylar, then printing the magenta only on the toy itself, and finally the blue on the background. During this experiment I had to use scrim (muslin) to apply and brush the ink off, which is a better way of doing complicated prints, rather than using yellow pages which makes it hard to see where you're brushing.

The second type of print was made by inking only certain areas of the plate, then reprinting with different colours. It gives some really interesting colour combinations.


This is the original black and white print, which a friend has described as 'spacey'. He was spot on.